COVID-19 - PPE solutions
About this project
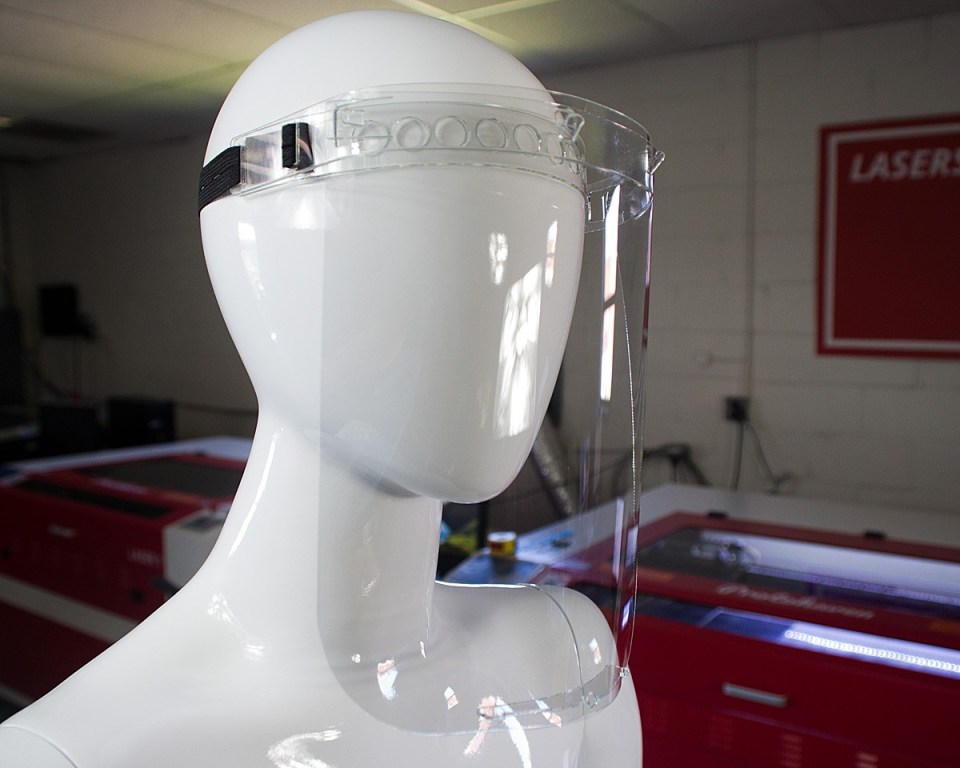
This design was created by Mat Thorne and Devin Montgomery (https://www.protohaven.org/proto-shield/). The Proto Shield is an open-source, low-cost, quickly produced face shield. It is designed to be functionally equivalent to the Prusa face shield. It’s just 100x faster to make. The visor is compatible with 3D printed Prusa parts. Please see the Resources section below for more information.
The challenge
Creating a protective face shield that is quick to print, easy to assemble and that can be scaled to be manufactured in large quantities.
Who it helps
Due to COVID19, Medical facilities worldwide are facing a dire shortage of face shields, N95 masks, and other personal protective equipment. Face Shields are not a replacement for N95 masks, however they do act as a protective physical barrier for healthcare workers's faces when dealing with patients' bodily fluids. Many conventional manufacturers have suspended production to follow government-mandated social distancing or run into supply chain issues due to the disruption in the global economy. The Maker Community has committed to enacting Plan C: filling in the gap with a global network of independent DIY fabricators.
How it works
Proto Shield
The Proto Shield is an open-source, low-cost, quickly produced face shield. It is designed to be functionally equivalent to the Prusa face shield . It’s just 100x faster to make. The visor is compatible with 3D printed Prusa parts.
Materials for the Proto Shield cost less than $1, and it can be produced by almost any laser cutter in less than 1 minute. It can be stored and shipped flat, is comfortable enough to be worn all day, and can be disassembled for sterilization and re-use.
One person can make hundreds of Proto Shields in a day from almost anywhere in the world. Here’s how:
Tools
Laser cutter (40 watt+; bed size 10″ x 16″ +)
Hot knife or scissors
Small flat head screwdriver
Rubber gloves, face mask, and disinfected work surface
Materials
.060” or 1.5mm PETG sheet (approximately 16” x 2” per shield)
.020” or .5mm PETG sheet (approximately 9.5” x 9.5” per shield)
.75” or 20mm elastic band (approximately 14” per shield)
Cut Files (Single Shield)
Head Band (.060” PETG)
PROTO-SHIELD_HEADBAND_V1.PDF Download
PROTO-SHIELD_HEADBAND_V1.SVG Download
3/4″ Elastic
Cut with hotknife (recommended) or scissors at 14”
Visor (.020″ PETG)
PROTO-SHIELD_MASK_V1. PDF Download
PROTO-SHIELD_MASK_V1.SVG Download
Cut Files (Mass Production w/ 29″ x 19″ or Larger Laser)
Head Band (.060” PETG)
Prep Work: Break 4′ x 8′ sheet down into (8) 24″ x 24″ sheets.
Yield: 128 Headbands & 128 Bottom Supports per 4′ x 8′ sheet.
PROTO-SHIELD_BANDS_24x24.PDF Download
PROTO-SHIELD_BANDS_24x24.SVG Download
3/4″ Elastic
Cut with hotknife (recommended) or scissors at 14”
Visor (.020″ PETG)
Prep Work: Break 4′ x 8′ sheet down into (4) 29″ x 19″ and (4) 19″ x 19″ sheets.
Yield: 50 Visors per 4′ x 8′ sheet.
PROTO-SHIELD_MASKS_29x19.PDF Download
PROTO-SHIELD_MASKS_29x19.SVG Download
PROTO-SHIELD_MASKS_19x19.PDF Download
PROTO-SHIELD_MASKS_19x19.SVG Download
Assembly Instructions
Here are all the final components. The elastic band is cut to 14”.
Bend the four tabs out to a 45º using a small screwdriver. The material has plenty of flex and will hold the new shape.
Here are the central tabs, bent outwards.
Don’t forget the horizontal tabs as well.
At this point the components are ready for construction. Your local healthcare center may want them in this state with the plastic coating in place for better decontamination. They could then be assembled on-site.
For assembly, first remove all the plastic coating. Use a small blade if you have trouble getting it started.
Line up the outer slits, keeping the smaller band (with the holes) in front.
Pull the elastic through the first hole from the outside. Give yourself a few inches for the other two holes.
Use this photo as a guide for the path of the elastic.
Then tighten it all up.
Repeat the process on the other side, making sure that the smaller component remains on the inside of the bend.
Here is the final headband, ready for the mask to be attached.
Starting at one side, pop the mask over the tabs. We found it easier to do this if you bend the section you’re working with flat before inserting the tab.
The mask attached to the headband.
The small curved piece snaps into the inside bottom of the mask to hold a curved shape.
The curved piece in place.
Please share this album and the cut files with anyone who could help out.
Project details
- Stage: Prototype
- Built by the Coronavirus (COVID-19) community, Global
- Category: COVID19
- 1 downloads
The build files for COVID-19 - PPE solutions are free to download from this page - open source, shared by TOM: Tikkun Olam Makers.
Related projects
- COVID-19 PPE Solutions
- COVID-19 - PPE solutions
- COVID-19 - PPE solutions
- COVID-19 PPE Solutions
- COVID-19 - PPE solutions
- COVID-19 - PPE solutions
Browse all TOM projects · Search projects · TOM communities · Makeathons and events